Sharing data with WPDx has never been easier. In fall 2020, WPDx completed a major overhaul of our ingestion engine to streamline the process for data sharing. This blog will take you step-by-step through the upload process. In most cases, this will take less than 30 minutes to complete! If you have questions, please reach out to info@waterpointdata.org.

Before you start, please review our Data Submission Policy to ensure that you have the correct permissions to share the data.

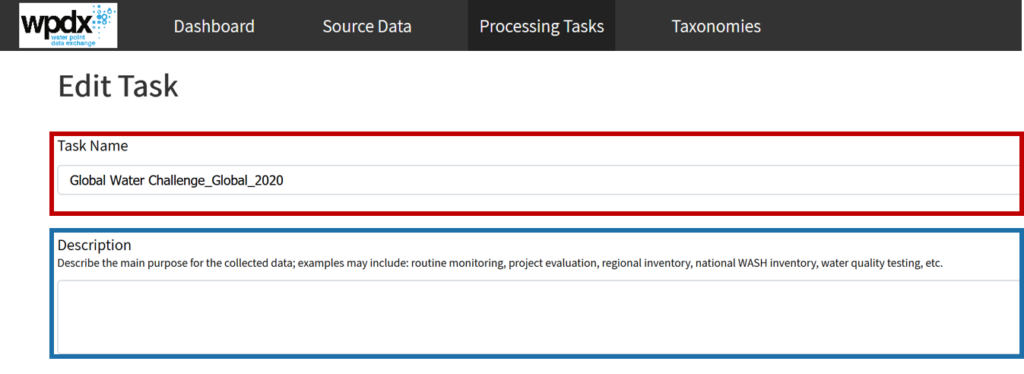
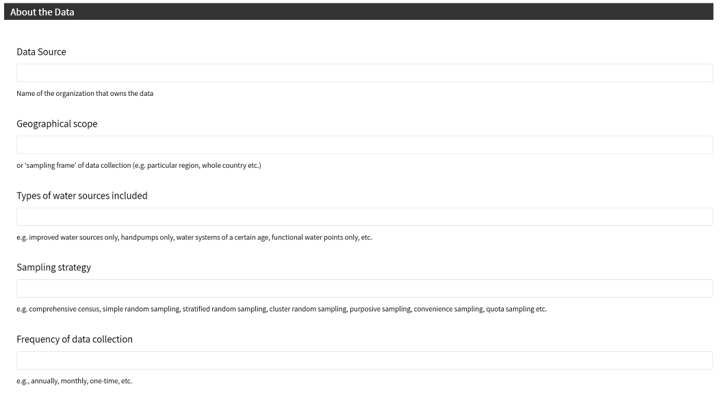
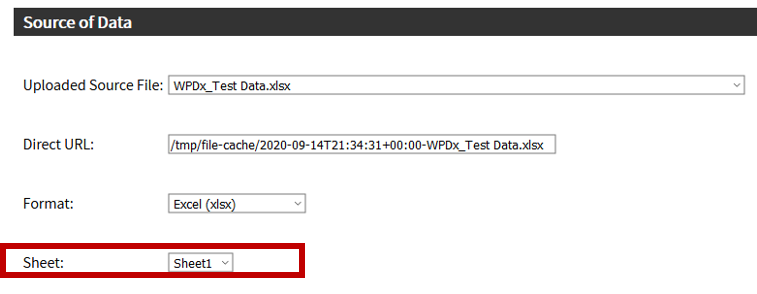
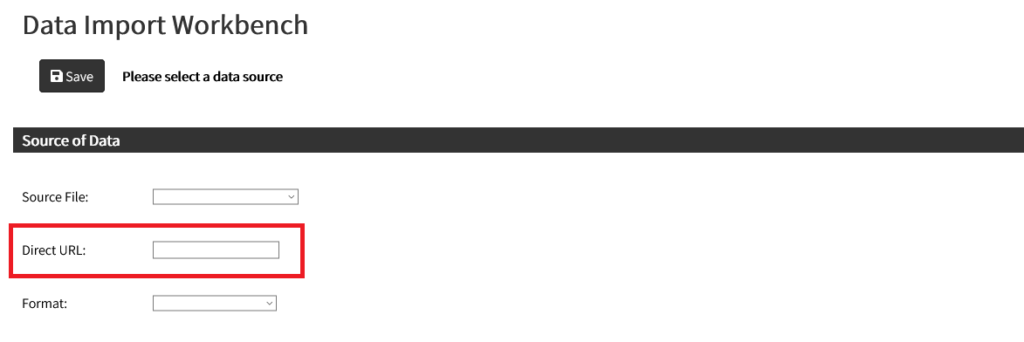
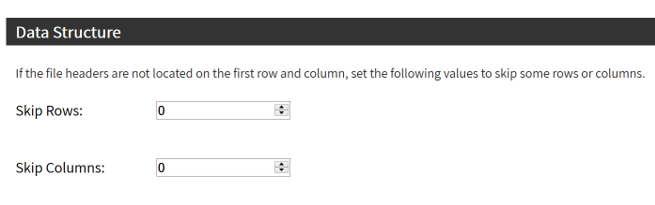
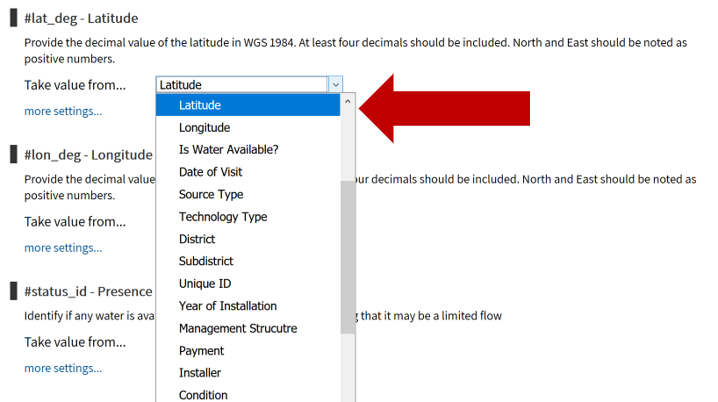
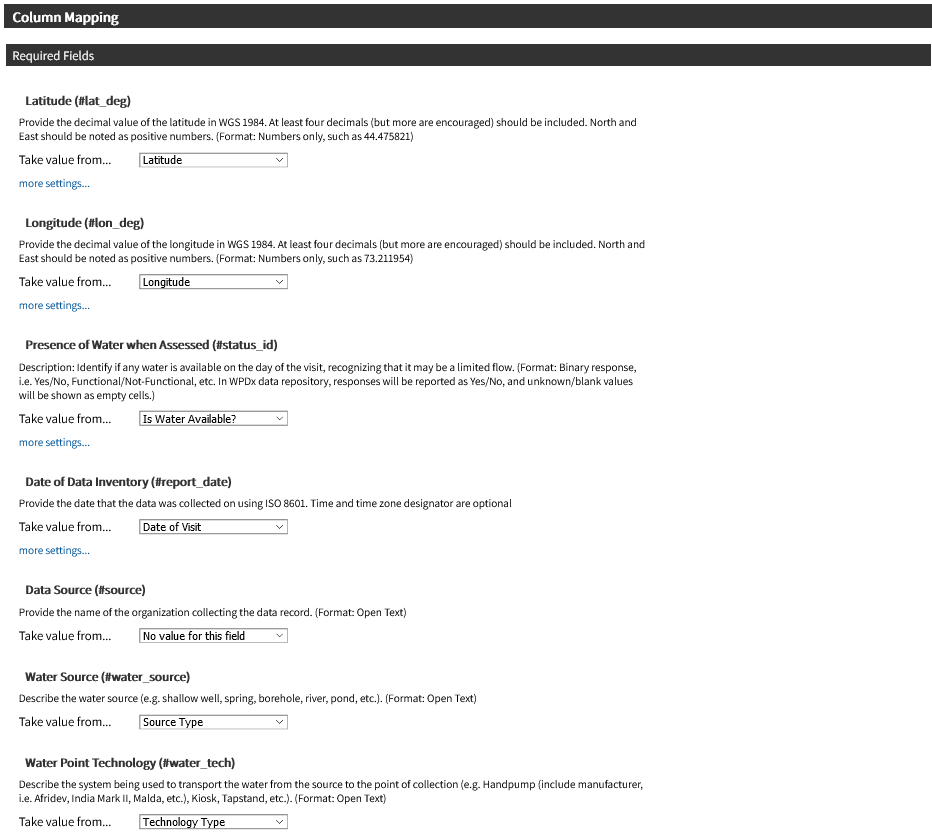
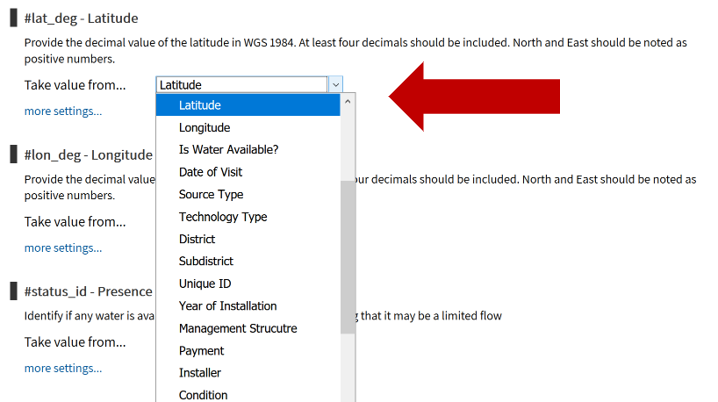
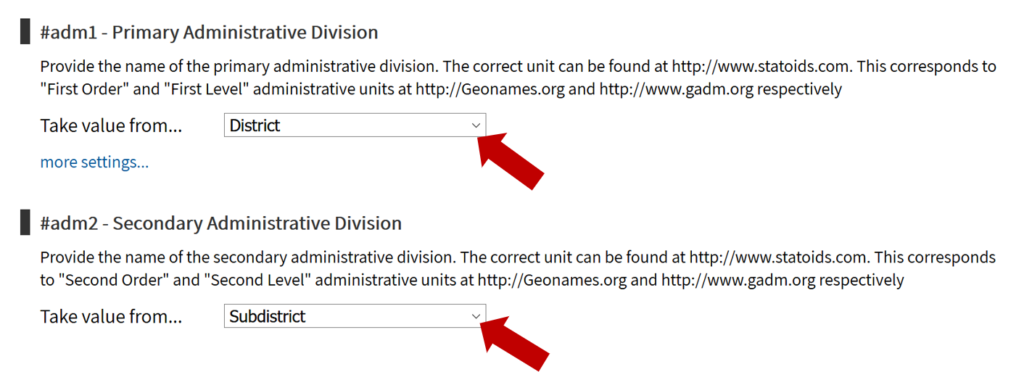
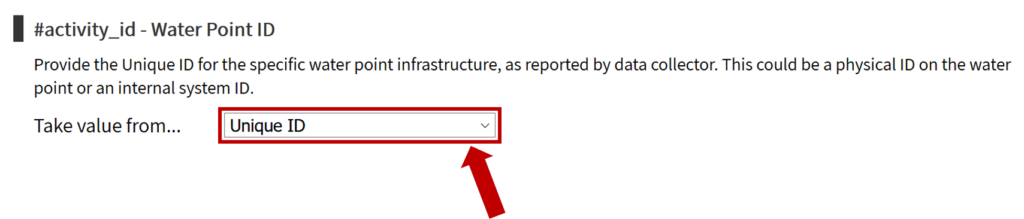
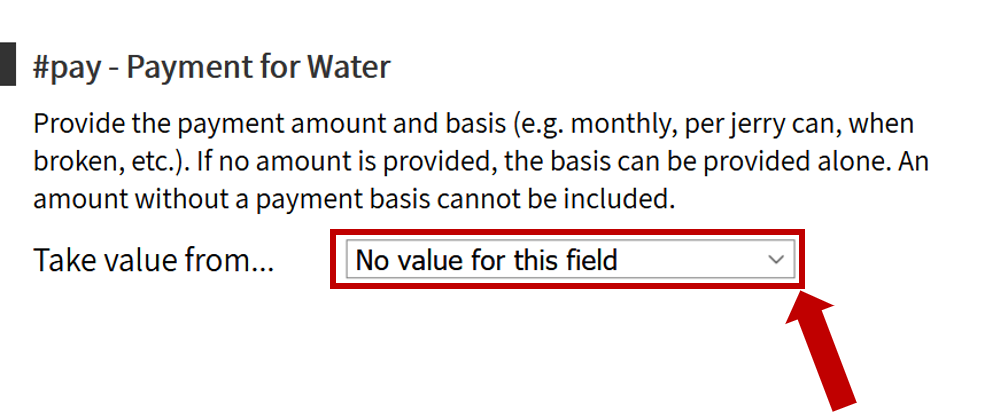
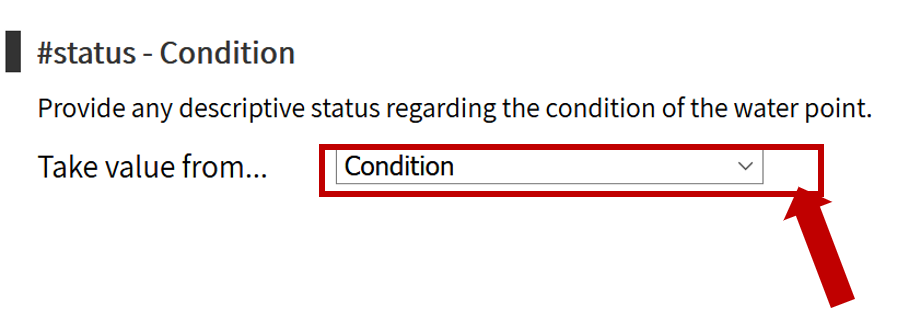
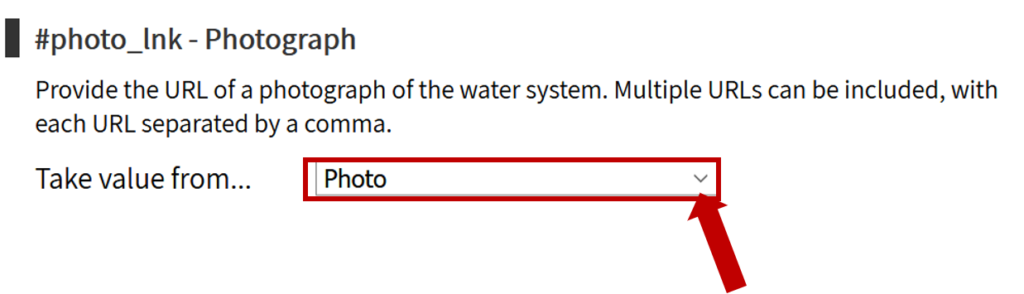
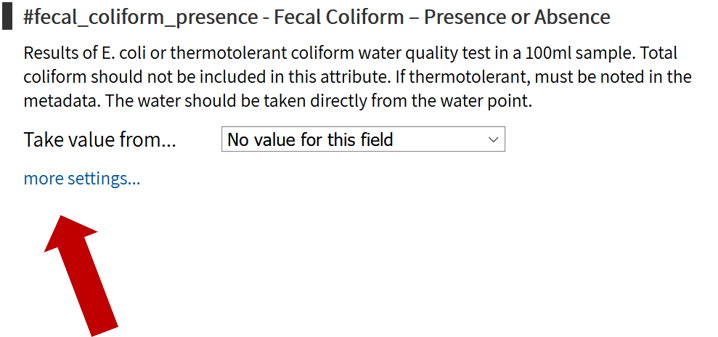
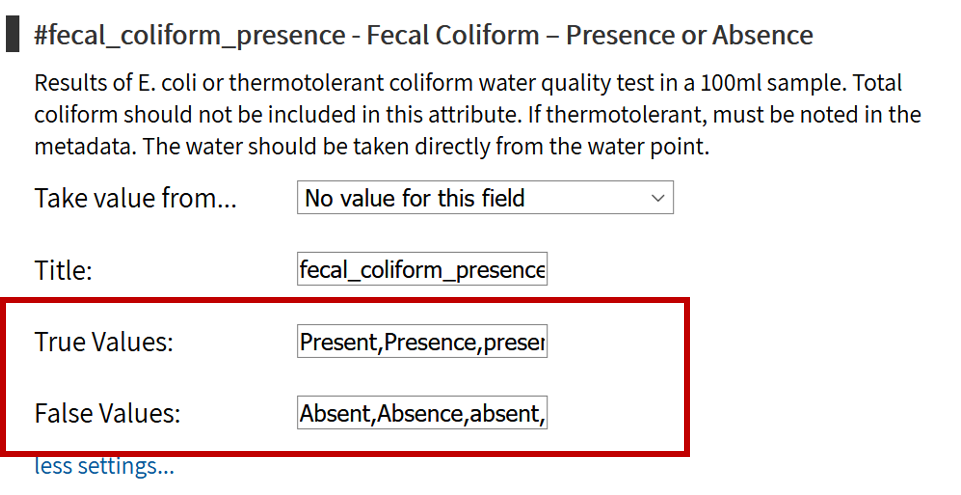
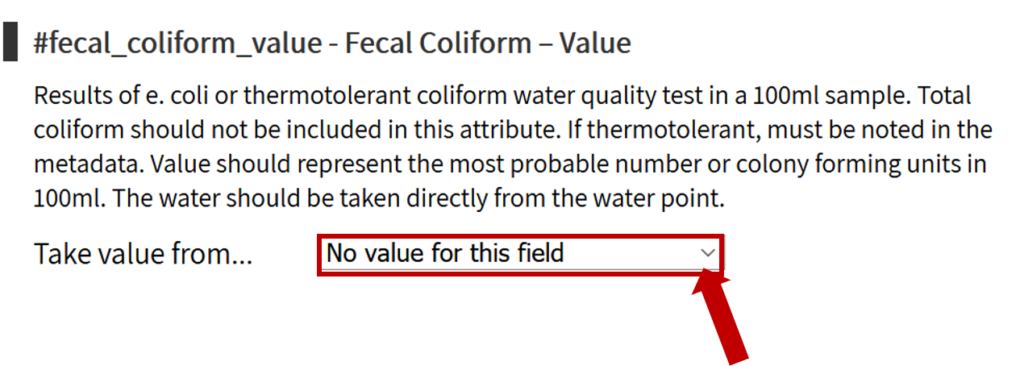
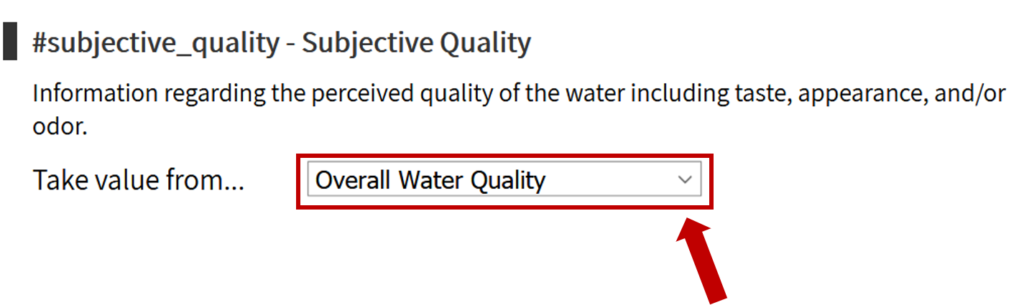
The first step is to review the WPDx data standard and compare with your organization’s dataset. The ingestion notes file can help you document how to map your data to the standard which will save you time later in the process.

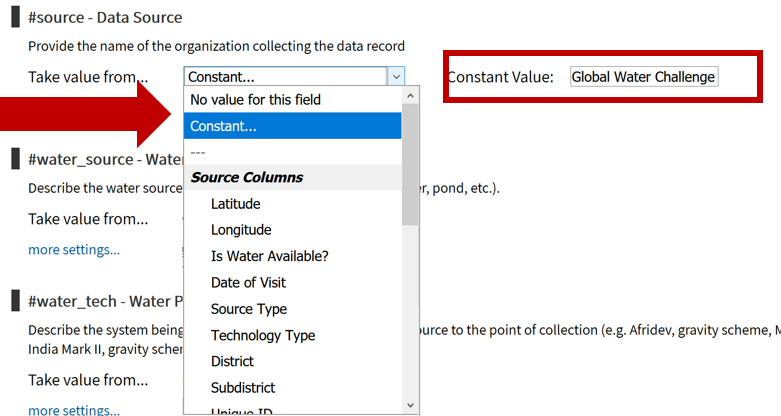
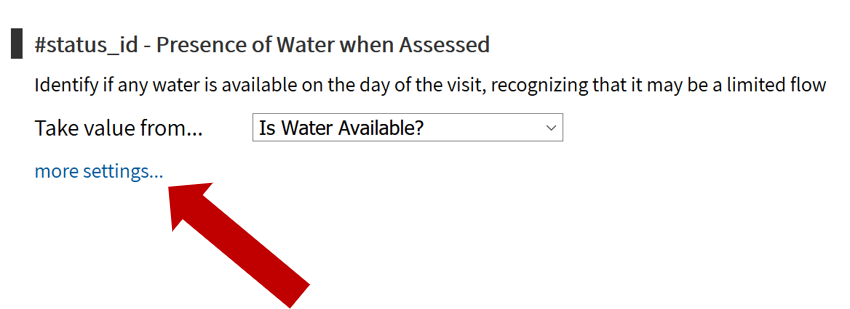
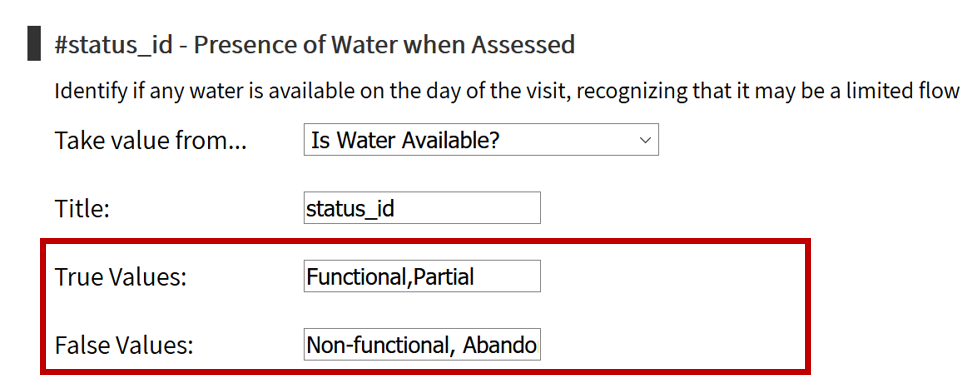
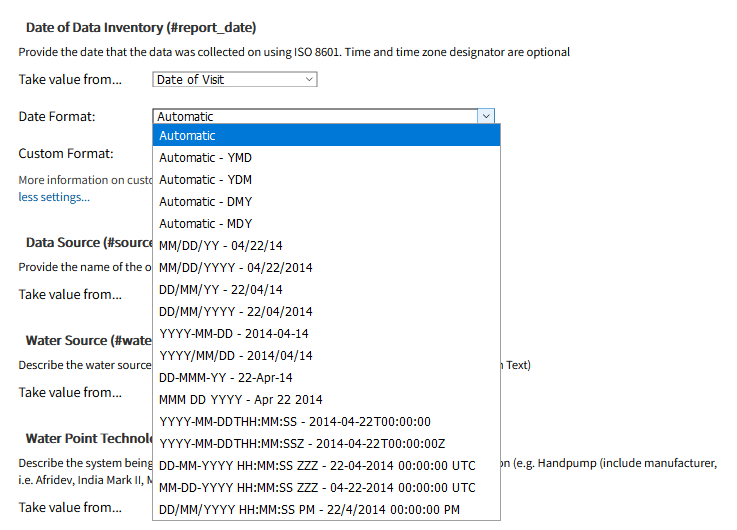
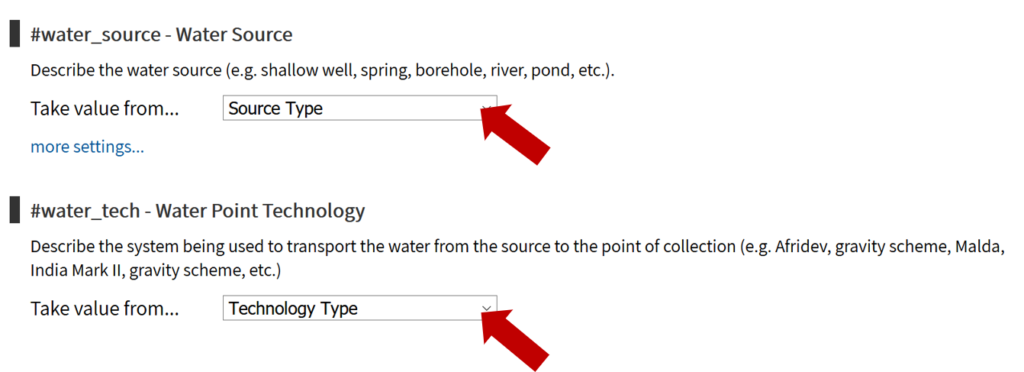
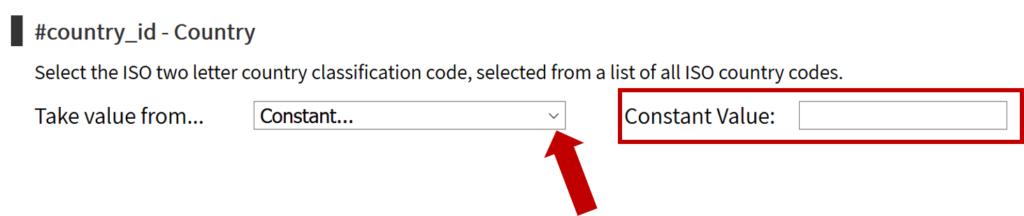
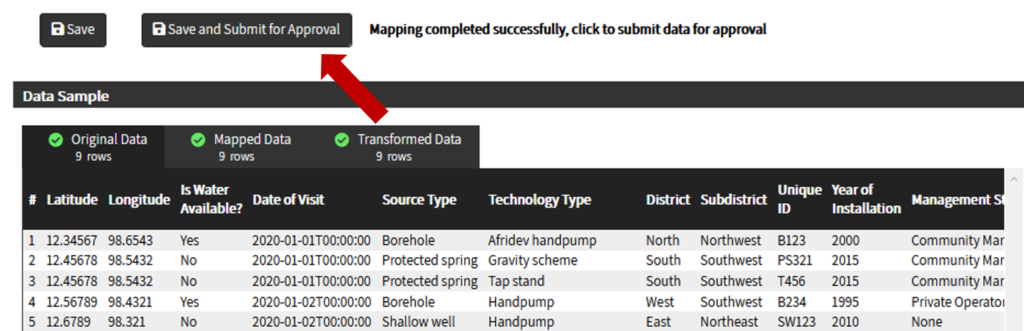
To upload data, the minimum requirements are for the dataset to include location (latitude, longitude in decimal degrees), presence of water when assessed (functional status), date of data inventory, data source (organization providing the data), and information on either/both the source and technology of the water point. While these are the minimum requirements, we highly encourage organizations to share as many parameters as possible to provide a more complete entry. These additional parameters, such as install year or management are utilized in the predict water point status tool.

Accessing the ingestion engine

Once you know which columns from your dataset you want to share, you are ready to start the upload process. Go to http://upload.waterpointdata.org to access the WPDx ingestion engine.

  • Click on “Login to the System.”
  • Please note, the ingestion engine requires a Google account.

After login, you’ll arrive at the ingestion engine dashboard:

Sharing your data file

There are two options for uploading data:

  • Upload a physical file (.xlsx, .xls, .csv) from your computer
  • Provide a web link to an API endpoint, Google Sheet, Dropbox or other online system

To upload a physical file:

Before you upload the file, please rename the file using the following format:

  • Organization Name_Countries included_Month Year of Data included
  • For example, Global Water Challenge_Uganda_Jan2020

Select the “Source Data” tab

  • Select “+ Upload Data File”
  • Click on “Select File”, browse to your organization’s data file and click “Open”
  • “File Upload Successful” message will appear at top of screen

Share data via weblink

To upload from a weblink, you must  provide a weblink with permissions. You will enter the weblink on the Data Import Workbench page after first providing some basic information about your dataset.

  • For Akvo Flow, request an API endpoint from your program manager. The API endpoint will be used in the direct URL box at the beginning of a processing task. For more details, please see here.
  • For mWater, create a datagrid formatted per the WPDx standard. This creates a permanent URL. Click on “Download as XLSX” and copy the download link. Use this in the direct URL box at the beginning of a new processing task. For more details, please see here.
  • For Dropbox, copy the download link (not the sharing link) to use in the WPDx ingestion engine. Use this link in the direct URL box at the beginning of a new processing task. Select the appropriate format from the dropdown.
  • For Google Sheets, ensure that the document is shared publicly (select “Anyone on the internet with this link can edit” from the share settings). Enter the URL for the Google Sheet in the direct URL box at the beginning of anew processing task. Be sure to select Google spreadsheet from the format dropdown. 
  • For custom data platforms, please contact us to determine how we can best connect.

Start New Processing Task

Select “Processing Tasks” tab

Select “+ New Processing Task”

Task Name and Description

Enter the Task Name in the following format:

OrgName_Country/Region_Month/Year of data

For example, Global Water Challenge_Global_2019

Provide the main purpose for the collected data under Description

Metadata

Complete the metadata prompts to provide a detailed overview of the data within your dataset.

The metadata will be visible on the data page for your dataset within the WPDx data catalog.

Point of Contact

Complete Point of Contact details for dataset.

To protect privacy, one option is to use an organizational level email (i.e., data@name.org) which can be forwarded by your organization to relevant contacts.

Agree to Data Sharing Terms

Check box to agree to Data Sharing Terms

Leave visibility as “Only Visible to Me”

Select: Save & go to Workbench

Data Import Workbench

Select your source file from the dropdown.

Allow data to process (this may take a few minutes). The Direct URL and format boxes will auto-populate.

If there are multiple sheets in your file, make sure the correct one is selected.

Scroll down to continue (the “Data is Processing” message may still appear)

If using a web address, enter directly in Direct URL text box and select the appropriate format option.

For JSON formats, be sure to leave the JSON Path field blank.

Data Structure

If your dataset is formatted to include only the column headers and the data, leave Skip Rows/Columns as “0”

If there are additional rows or columns which should be skipped (i.e., additional headers or title cells) enter the number of rows/columns to skip.

For the sample data shown below, you would enter “2” in Skip Rows. Leave Skip Columns at “0”

Ignored Values

If your dataset includes terms for blank/unknown values which should be ignored (i.e., Unknown, N/A, etc.), please enter those terms in the text box.

Use a comma as a separator between terms. Do NOT include any blank spaces between commas and terms.

For example: “unknown,Unknown,N/A,0,null,blank”

Data Mapping: Getting Started

There are two methods to complete the data mapping process:

Primary method..

  • Using the dropdown menu, scroll to select the column header from your dataset which matches the WPDx standard.
  • Some parameters may pre-populate, especially if your dataset is labeled with the WPDx #titles. Verify these selections.
  • Note: you cannot map the same column to two different standard parameters.

Optional method..

If there is a parameter which is not in your dataset, but for which a common value can be applied to all datapoints, Select “Constant…” from the dropdown.

  • Examples
  • #source – Data Source –> Constant: Name of Org
  • #country_id – Country –> Constant: “UG” or “GH”
  • #orig_lnk – Public Data Source URL –> Constant: URL

Data Mapping: Required Fields

There are 6 mandatory parameters:

  • #lat_deg – Latitude
  • #lon_deg – Longitude
  • #status_id – Presence of Water when Assessed
  • #report_date – Date of Data Inventory
  • #source – Organization providing data
  • #water_source – Water Source AND/OR
  • #water_tech – Water Point Technology

Data Mapping: #lat_deg and #lon_deg

Latitude and longitude must be in decimal degrees in WGS84.

Select the appropriate column header which matches with #lat_deg.

Go the next dropdown and make the selection to match #lon_deg

Data Mapping: #status_id

Select the appropriate column header from the dropdown

Default values include Yes/No. “Unknown” values (see slide 14) will be converted to a blank cell in the WPDx Global Data Repository

If your dataset does not include Yes/No, but instead terms such as “Functional/Partial/Non-functional” select “more settings..” and enter those terms.

True Values = terms which indicate the water point IS functional

False Values = terms which indicate the water point is NOT functional

Do not leave any spaces between terms, just a comma (i.e., Yes,functional)

Data Mapping: #report_date

Select the appropriate column header from the dropdown

The system will automatically detect the format of the dates in your dataset

If there are errors indicated, select “more settings…” and choose a specific format. (This should only be an issue in rare circumstance)

Data Mapping: #source

Provide the name of the organization providing the data.

If your dataset includes data from multiple sources, please map the parameter to the appropriate column header that lists each organization.

Otherwise, the entry for Data Source in the About the Data section will be applied to all uploaded records.

Data Mapping: #water_source & #water_tech

At least one of #water_source or #water_tech must be mapped for the upload to proceed.

Select the appropriate column header/s from the dropdown

If the information is constant for all values, you can instead select “Constant.. “ and enter in the appropriate value in the text box.

Data Mapping: Optional Fields

The “Optional Fields” are not required, but they do help to provide a more robust dataset for understanding the status of the local water sector.

Please map as many of the WPDx parameters as possible.

For any parameters which do not align with your dataset, you can select “No value for this field” (this is the default selection) and go on to the next parameter.

For example, if your dataset does not include any information on payment:


Data Mapping: #country_id

Select the ISO two letter country classification code, selected from a list of all ISO country codes.

If your dataset includes entries from different countries, this information should be included in your data file. Select the appropriate column header from the dropdown menu.

If your dataset only includes entries from a single file, you can select “Constant..” and enter a value to be applied to all rows.

Data Mapping: #adm1, #adm2, #adm3

#adm1, #adm2, and #adm3 are official administrative division designations

If you have questions, look at GADM.org (see tutorial on next slides) or statoids.com to determine the appropriate designations.

GADM.org: Check administrative divisions

1. Go to GADM.org and Select “Maps”

2. Click on country of interest

3. Select “Show sub-divisions”

4. This creates a map and a list of first-level subdivisions

5. Click on one of the first level sub-divisions

6. Click on “Show sub-divisions

7. This creates a map and list of second level subdivisions

Data Mapping: #activity_id

Select the appropriate column header from the dropdown

If a locally or globally recognized standardized identification number exists (i.e., a physical well ID number of barcode) within your dataset, please use that column

OR

If your organization has a unique id system which would allow water points to be matched within your organization over time, please use that column


Data Mapping: #scheme_id

Select appropriate column header from dropdown

Data Mapping: #install_year

Select the appropriate column header from the dropdown.

Note that this field accepts a four-digit year or a full installation date. Only the year will be extracted from full date entries.

Data Mapping: #installer

Select appropriate header from dropdown.

Data Mapping: #rehab_year

Select the appropriate column header from the dropdown.

Note that this field accepts a four-digit year or a full installation date. Only the year will be extracted from full date entries.

Data Mapping: #rehabilitator

Select appropriate header from dropdown.

Data Mapping: #management

Select appropriate column header from dropdown.

Select the management classification of the entity that directly manages the water point. Example management types include:

  • Direct Government Operation
  • Private Operator/Delegated Management
  • Community Management
  • School
  • Healthcare Facility
  • Other Institutional Management
  • Other

Data Mapping: #pay

Select appropriate column header from dropdown.

Data Mapping: #status

Select appropriate header from dropdown.

Please note that the system can not map the same column to two different WPDx parameters. If you would like to use the same column, please duplicate it in your dataset (and change one of the column headers). For example, it may be useful to use the a duplicated version of your functionality column for both #status_id and #status.

Data Mapping: #orig_lnk

If the data is available via a public link, select ‘Constant’ from the dropdown and enter it so that it can be applied to all rows.

If there is to a public link, leave as ‘No value for this field’

Data Mapping: #photo_lnk

Select appropriate column header from dropdown.

If there is to a public link, leave as ‘No value for this field’

Data Mapping: #fecal_coliform_presence

Select appropriate column header from the dropdown

Default values include Present/Presence and Absent/Absence. If your dataset include other terms, select ‘more settings…’ and enter the terms into the True Value and False Value text boxes.

Separate terms with a comma but do not include any spaces.

Complete associated metadata questions at the bottom of the page (see Water Quality Metadata section for more information).


Data Mapping: #fecal_coliform_value

Select appropriate column header from dropdown

Complete associated metadata questions

Data Mapping: #subjective_quality

Select appropriate column header from dropdown

Complete associated metadata questions

Data Mapping: #notes

Select appropriate column from header or apply Constant value is appropriate.

The #notes parameter can be used to enter custom data which the host country government or organization has selected.

For example, some organizations want to track seasonality, additional administrative districts, or some combination.

Multiple parameters can be included by creating a column that includes the parameters of interest, separated by a “;” or “…” delimeter.

Water Quality and Notes Metadata

If you mapped the #fecal_coliform_presence, #fecal_coliform_value or #notes columns, please complete the additional metadata question section.

Once mapping is complete

Select “Save” or “Save and Submit for Approval”

Select Save and Submit for Approval when your data has been fully mapped and is ready for upload

The status in the Processing Tasks tab will now show as “Pending”

An administrator will be notified and will complete the uploading process

Once approved, an email will be sent to the uploader’s email address

If the mapping was not successful, you will see an error message indicating which parameter was not mapped and explanation of why. Once the error has been fixed, you can submit the processing task for approval.

Successful Upload!

Once the data upload has been completed by an administrator, the status in the Processing Task will be marked as “Success”. An auto-generated email will also be sent to the account email address. 

You can view an overview of the dataset in the WPDx data catalog by clicking on the eye icon.

The data catalog dataset page includes:

  • Metadata and contact details
  • Ingestion report – summary statistics of the number of rows uploaded and any errors encountered
  • Link to download source file

Data will be visible on the WPDx data repository within 24 hours.

Need to make changes?

Users can edit their datasets and processing tasks to correct errors or make other additions (i.e., add a new column that was not previously mapped).

To remove data from WPDx, please contact the administrator at info@waterpointdata.org with “Request to remove data from WPDx” in the subject headline. Include the name of the source file and the reason for the removal request.

Source Data: Update Contents or Delete

If you realize you have made an error and/or need to edit or amend an existing dataset, go to the Source Data tab, select ‘Update Contents’ and upload a revised file.

Once the file has been updated, go back to the associated Processing Task and check/edit the Processing Task content and data mapping and hit “Save and Submit” at the bottom of the Data Import Workbench page.

Do not use ‘Update Contents’ to initiate a new dataset upload as this will replace any previously shared data. Instead upload a new file and start a new Processing Task.

Editing a Processing Task

If you want to add/edit the metadata for your dataset and/or make changes to the way that the data is mapped to the standard, select “Edit” from the Processing Task tab.

Make any changes and hit “Save and Submit” at the bottom of the Data Import Workbench page.

An admin will be alerted of your update and will review and process the upload.

Questions?

Please contact: info@waterpointdata.org

Check out our Resources and FAQs